Free Craft Project
Christmas Card Holder
Submitted by Karen Hunady from Crafts For All Seasons...
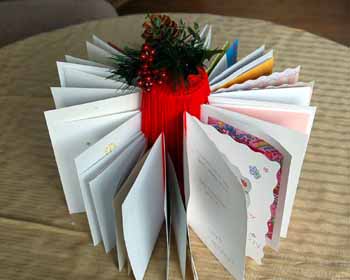
My grandmother taught me how to make this Christmas card holder craft. She used to make them for her family and friends at Christmastime, and would give them away as gifts. It is an excellent way to organize and display all your Christmas cards. The craft is made from an empty chip can, which is wrapped over and over again with yarn. The cards can then slip into each yarn string to hold it in place. These can also be made in different colors to display birthday cards, graduation cards, etc.
Materials
- empty tall chip can
- can opener
- red or green yarn (or color of choice)
- scissors
- yarn needle
- Christmas floral pick
- hot glue gun
Instructions
1. Begin the Christmas card holder by removing the bottom of the chip can with a can opener. Save the bottom piece.
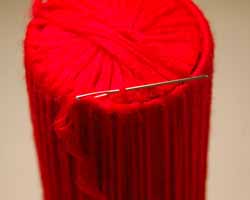
2. Next, begin to wrap the red or green yarn around the chip can, lengthwise. The yarn will wrap around the entire length of the can and then wrap inside the middle of the can (see photo for help). Keep wrapping the yarn over and over until you can no longer see the chip label. But don't wrap too much, you do not want the strands overlapping too much.
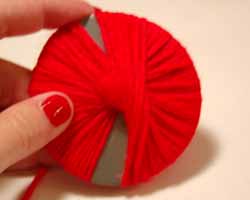
3. When you are finished, tie off the yarn in a knot to secure. Next, you want to wrap the bottom of the chip can with yarn. Begin wrapping it across, and over, and keep turning the circle clockwise as you go, so you eventually cover the whole lid. When you are finished, secure with a knot.
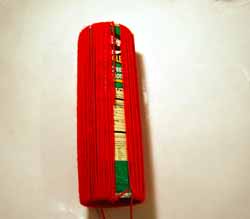
4. Now it is time to assemble the top to the can. Place the wrapped top on the tall can, then thread a yarn needle with yarn. Sew on the top of the lid to the can by stitching through a loop on the can top, inside a loop of the tall can. See the photos for help.

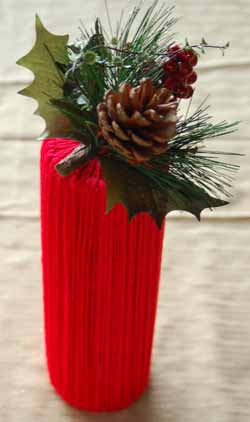
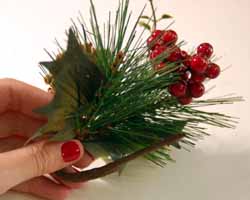
5. To finish off the Christmas card holder, I used a pretty Christmas floral pick. You could also use a pretty bow. For the floral pick, just bend the wire holder as shown, then thread it into the top of the can, in between the yarn. You can use some hot glue to secure.

6. To add a card, just open up the card and slip it through one strand of yarn. Slide the card in so the yarn lies in the inside crease of the card.