Free Craft Project
Crochet Picture Frame
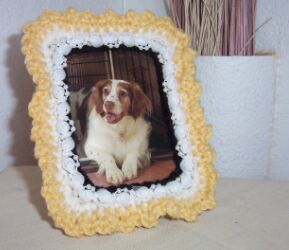
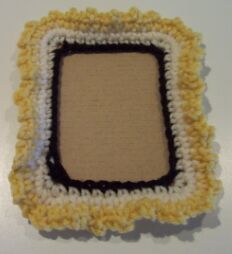
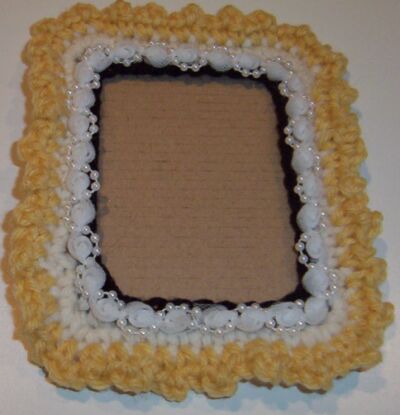
This crochet picture frame is just a sample of what you can do with this particular pattern. Make it larger, change colors, decorate it with ribbon or beads. Anything you like. The only limit is your own imagination!
Size: 4-3/4" wide x 5-3/4" tall
Materials
- scrap yarn - black, white, burnt yellow (or any colors you like)
- crochet hook - size G
- decorative trim
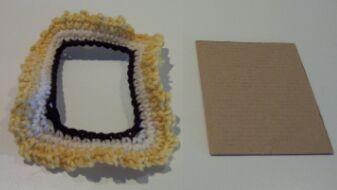
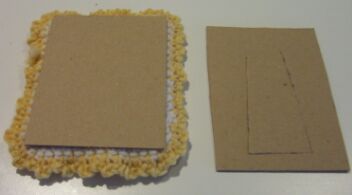
- 2 pieces stiff cardboard (3-1/4" x 4-1/4" and 3-1/4" x 4-3/4")
- hot glue gun
Instructions
Round 1 - With black yarn, ch 42, sl st in first ch to form a ring. Ch 1, 3 sc in first ch, *sc in next 8chs, 3 sc in next ch, sc in next 11 chs*. 3 sc in next ch. Repeat between * *. Join with sl st in ch-1, leaving last 2 loops on hook. Change to white yarn. (50 sc).
Round 2 - Ch 1, sc in next sc, 2 sc in next sc, 2 sc in next sc, sc in next 8 sc, (2 sc in next sc) 3 times, sc in next 11 sc, (2 sc in next sc) 3 times, sc in next 8 sc, (2 sc in next sc) 3 times, sc in next 11 sc. Sl st in ch-1 leaving last 2 loops on hook. Change to yellow yarn.
Round 3 - Working in back loops only, ch 1, sc in first st, ch 1, sc in next st, ch 2, (sc in next st, ch 1, sc in next st, ch 2) around.
Join. Fasten off.
Assembly
Attach the 3-1/4" x 4-1/4" cardboard to the back of the crochet piece. Center it against the outside edge of the white yarn. Glue along the sides and bottom only. Do NOT glue the top edge. It needs to be left open so you can insert the photo.
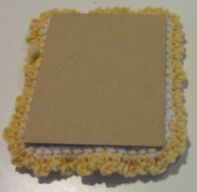
Glue the decorative trim all around the inside edge of the frame.
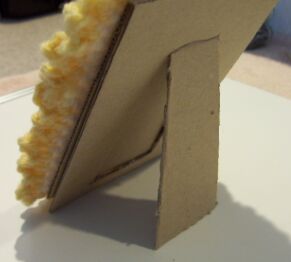
On the second piece of cardboard, draw a "leg" as shown in the image below.
Cut on the red lines. Fold on the black dotted line...
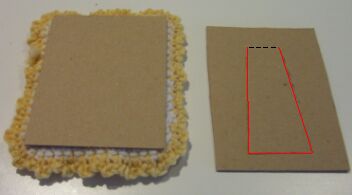
Glue the second cardboard onto the first. Align the tops and sides. That allows the second cardboard to be 1/2" longer on the bottom edge.