Free Craft Project
Fourth of July Clay Bracelet
Submitted by Karen Hunady from Crafts For All Seasons...
This polymer clay bracelet will look really festive for your Fourth of July party. Remember that it can be worn all year to show your patriotism, and for Memorial Day and Labor Day parties as well. Read on to find out how to make this fun polymer clay bracelet!
For helpful hints working with polymer clay, visit Tips and Techniques.

Materials
- Red, white, and blue polymer clay
- Pasta machine or rolling pin for making flat layers of clay
- Elastic stretchy thread for making bracelet
- Beads of choice for threading in between flag beads
- Needle
- Razor blade
- Clear acrylic sealing coat (or clear fingernail polish)
- Pin
- Super glue
Instructions
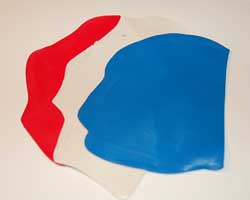
1. Begin the patriotic polymer clay bracelet by conditioning all your clay until it is soft and easy to work with. Begin by rolling out three layers of red, white, and blue clay. Using a pasta machine set on the largest setting is the easiest way to do this, and makes each layer uniform. If you do not have a pasta machine dedicated for polymer clay use, you can use a rolling pin or brayer.
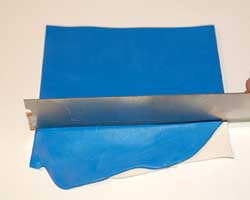
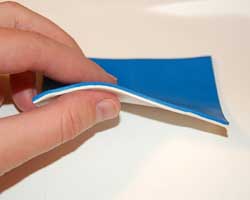
2. I am going to explain how to make an American flag cane. If you have never heard the term "cane" before, or made one, I suggest you first read through another craft I have this website, where I explain the concept of cane work. Click here to be linked to that craft (a new window will open). If you are familiar with cane work, then read on. This design is made using a checkerboard cane. To begin, layer the flat sheet of blue on top of the white sheet of clay, then trim off the sides using a razor blade so you get a neat square shape.
3. Next, using the razor blade cut this square in half. Take one half and place it one top of the other, so now you have four layers, alternating blue and white.
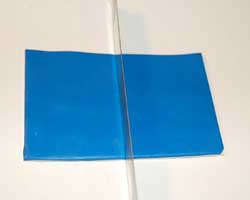
4. Continue by once again cutting the four layer rectangle in half, and stack each half on top of one another so now you have eight layers.
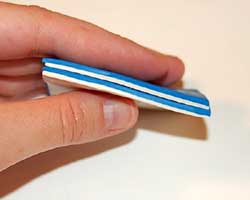
5. Take the stack of layers and begin to cut off slices of it using your razor blade, as shown below. You are cutting down through the layers. Try your best to get each slice the same thickness.
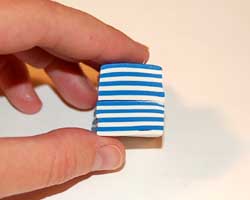
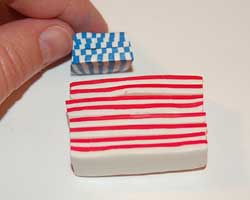
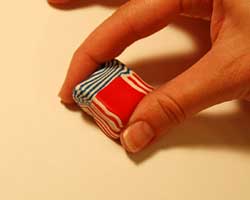
6. Take each slice, and stack them on top of one another, but setting them slightly off-set to make a checker board pattern, as shown below. Use a razor blade to slice off the sides that are off-set, to make a nice square block. Set this aside to rest.
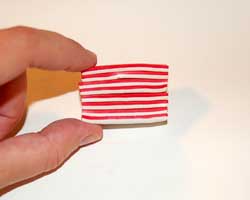
7. Next I'll explain how to make the red and white stripes, which you already know how to do from working with the blue clay. Layer a red sheet of clay and a white sheet of clay together, and trim off the ends to make a neat square.
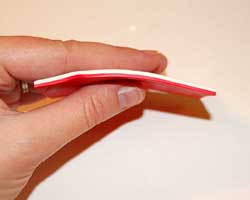
8. Cut these layers in half, and stack on top of one another. Continue to cut the layers in half and stack until you get a nice block of stripes that resembles the American flag.
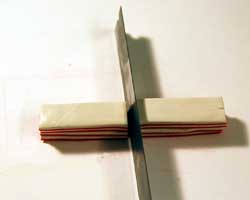
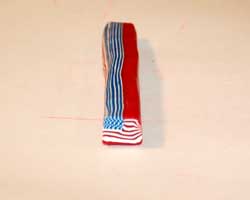
9. Next, get the blue checkerboard section near the red and white stripes. Use a razor blade to cut out a square in the upper left section of the stripes, to fit the blue checkerboard cane. Push the pieces together and trim off any excess to make the cane the same length, height, and width. Below is the American flag cane before compression.
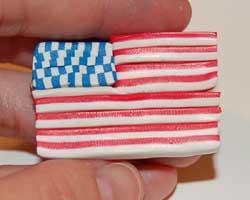
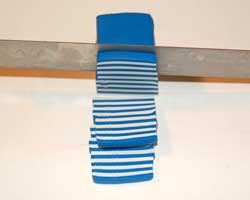
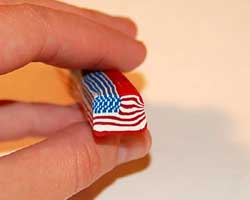
10. It is now time for compression! Gently work with the American flag cane using the palms of your hands to flatten the flag, and your fingers along the sides of the flag to maintain the rectangle shape throughout compression. It is harder to compress a rectangle or square shape, than a round one, obviously... so take your time. You want the size of the cane to be small, the size you choose is the size your beads will be. My beads were 1/2 inch long. When you are done compressing, let the cane rest for awhile before slicing. I even popped mine in the fridge for awhile to really let it cool down.
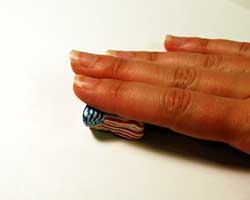
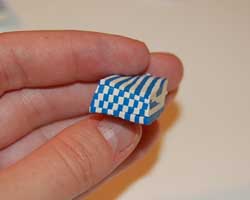
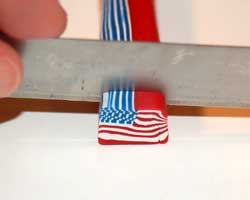
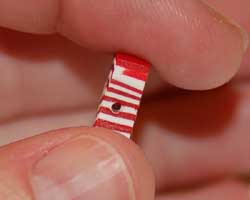
11. Now the fun part of making the polymer clay bracelet! Slicing the cane. Cut thick slices for the beads, because you will need to poke a hole through the length of the bead. This is much harder, if not impossible, to do on a thin slice. The stripes may be a little wavy from compression, but this makes the beads unique and almost whimsical! If the edge of the stripes is really distorted I recommend using a razor blade to cut off the edges to make a sharp edge.
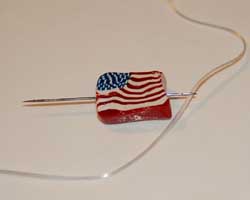
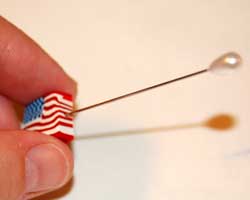
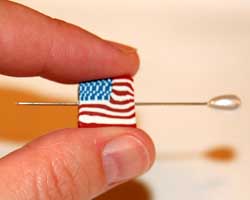
12. Continue with the polymer clay bracelet by threading a pin carefully through the side of each bead, trying to make sure it comes out in the middle on the opposite side. You can begin with a pin, then remove it and pierce with something larger to make the hole bigger (here I used a short length of 18 gauge wire). When all the holes are poked through, the beads are ready to be baked in the oven, according to the manufacturer's instructions.

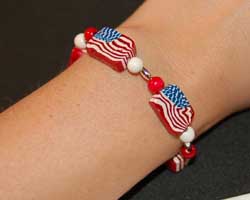
13. When the beads are cooled off from the oven, give them a clear coat of sealer. Then, assemble the polymer clay bracelet using a needle threaded with elastic thread. Thread on the flag beads with intermediate beads of choice. Tie the elastic cord with a simple square knot, then dot the knot with a drop of super glue. You can also make earrings from two slices of the cane, just glue on earring backs. Polymer clay bracelets also make great gifts! You will probably have a cane long enough to make several bracelets.