


Free Craft Project
Free Crochet Cap Pattern
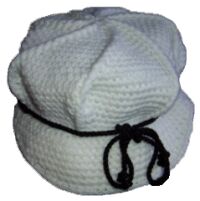
This free crochet cap pattern showcases a popular classic. And it just so happens that the style is making a comeback.
Mind you, it can be a little tricky working out the exact pattern, but the result is definitely work putting in a bit more effort.
Materials- yarn
- 1-1/2 yards of cord
- crochet hook - size G
Instructions
Special Stitch:
raised dc - yarn over, insert hook around the bar of the next dc (see Figure 1 below) and draw loop through, yarn over and complete a dc

Ch 4. Join with sl st to form a ring.
Round 1 - Ch 1. In ring, make (sc, dc) 7 times. Join with sl st in first sc. (14 st)
Round 2 - Ch 1, sc in joining, * raised dc, 2 sc in next sc. Repeat from * around, ending with sc in same place as first sc. (21 sts, including 7 raised dc) Join.
Round 3 - Ch 1, sc in joining, * raised dc around next raised dc, sc in each sc to within the sc before next raisd dvc, 2 sc in next sc. Repeat from * around, ending with sc in same place as first sc (7 sts increased). Join.
Rounds 4 through 15 - Repeat Round 3. (112 sts at end of 15th round)
Round 16 - Ch 1, sc in joining, * raised dc around next raised dc, sc in each sc to within next raised dc. Repeat from * around. (112 sts) Join.
Rounds 17 through 20 - Repeat Round 16.
Round 21 - Ch 1, sc in joining, * raised dc around next raised dc, (insert hook in next sc and pull loop through) 2 times, yarn over and draw through all 3 loops on hook - 1 sc decreased, sc in each sc to within next raised dc. Repeat from * around - 7 sc decreased. Join.
Repeat last round until desired head size is achieved.
Next Round - Sl st in each st around, being careful to maintin head size. Fasten off.
Peak (make 2)
Ch 57.
Row 1 - Sc in 2nd ch from hook, sc in each ch across. (56 sc) Fasten off.
Row 2 - With right side facing, attach yarn in 3rd sc from beginning of last row, ch 1, sc in next sc, and in each sc across to within last 3 sc, sl st in next sc. Fasten off.
Rows 3 through 7 - Repeat Row 2.
Row 8 - With right side facing, attach yarn in first sc on Row 1, ch 1, sc in each sc along shaped edge. Fasten off.
Make a second piece in the same way.
With wrong sides together, join both pieces by working sc through both thicknesses along the shaped edge. Ch 1, turn and work sl st in each sc just made.
Fasten off.
Finishing
Leaving 2 seconds of cap free across the center back, pin straight double edge of peak against sl st edge of cap. Sew double edge of peak to sl sts.
Sew cord to the center back edge of cap. Bring the ends around and tie in a bow at center front. If necessary, trim cord and knot both ends.