Free Craft Project
Golf Pen Holder
Submitted by Karen Hunady from Crafts For All Seasons...
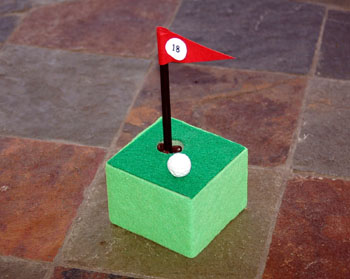
This golf pen holder can be made for your favorite golfer. If your Dad loves golf, this would make a great Father's Day gift for his desk. This craft is very easy to make.
Materials
- block of silk flower foam 3-1/2" x 3-1/2"
- 3-1/2" x 3-1/2" square of green felt
- larger piece of lighter green felt (to wrap around sides of foam block)
- black ball point pen
- red and white cardstock (or foam board)
- scissors
- glue
- quarter (or something round the same size)
- exacto knife
- small spoon (or other "scooping" tool)
- coffee beans (or similar dark dry beans) to fill the golf hole
- clothespin
- white polymer clay for the golf ball (or you can use a white marble or large white bead)
Instructions
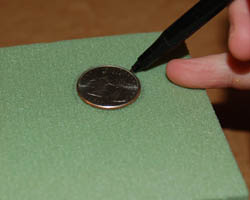
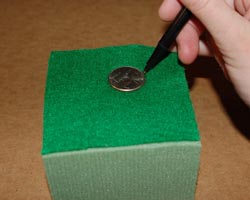
1. Begin the golf pen holder by placing a quarter (or use another appropriate template) on top of the foam oasis. Place it slightly off center for a more natural effect. Trace around the quarter with the pen.
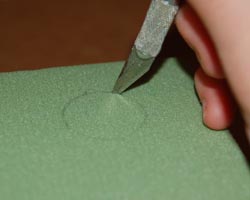
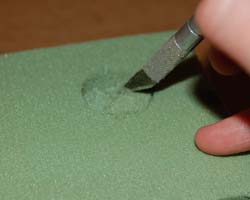
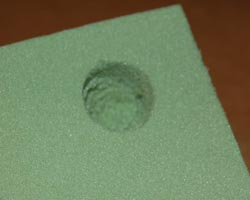
2. Take an exacto knife and carefully cut along the traced lines, creating the walls of the hole. Take your time and be careful here. Next, you want to scoop out the inside of the hole. Start by cutting an "X" in the hole, and use the knife to start removing small sections. Once you have a depression, you can insert a small spoon or other scooping tool to clean it out. Make it deep, at least 2 inches.
3. Next, place the square of green felt (cut to the same size as the top) on top of the golf green. Place the quarter on the felt, over the hole. You will be able to locate the hole because the quarter will sink in a little. Trace around the quarter on the felt. Then, cut out the felt circle. Glue the green felt on top of the foam oasis.
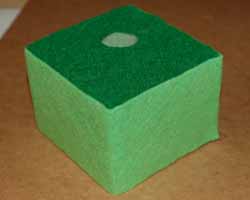
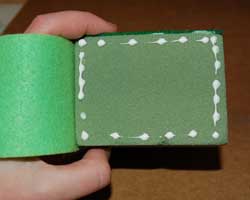
4. Next, use a lighter shade of green felt to wrap around the oasis. Measure and cut out a rectangle the proper length. Then attach the felt all around the sides with glue.
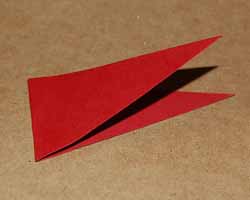
5. Your golf green is now done, and its time to move on the pen. I used a pen that was already all black. If you don't have a black pen, you can cover a regular pen with black foamie board, or black electrical tape. To make the flag, fold a small piece of red cardstock or red foam board in half. Then cut out a pennant shape.
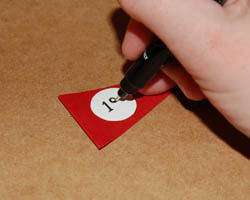
6. Trace around a penny (or other suitable template) on folded white cardstock and cut out the two small circles. These can be glued to either side of the pennant. Use a black marker to print the number hole you want. Or you can put "World's Best Golfer" or "World's Greatest Dad".
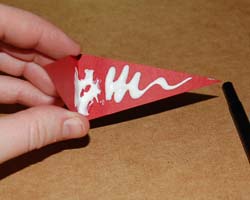
7. Apply glue to the inside of the folded pennant. Use a good strong glue. Make sure you put a lot in the fold. Then, wrap this around the top of the pen. Use clothespins to clip it tight and allow the pen to dry well.

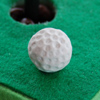
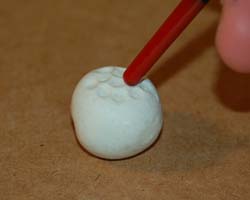
8. Now it is time to make the golf ball for your golf pen holder. Roll a ball out of the white clay between the palms of your hands. To make the depressions in the golf ball, I took the back of paintbrush and poked small depressions in all over the ball. Bake the golf ball according the manufacturer's instructions. Then, glue the ball to the felt green.

9. The pen holder is almost done. The last step is to add in the coffee beans or beads to the golf hole. This supports the pen and creates an anchor. It feels "nice" putting the pen back in the hole... the beans slightly "grab" the pen. The idea is the pen will not push all the way to the bottom of the hole you made, the beans will stop it halfway or so. Fill the hole, not quite to the top, with beans. The golf pen holder is now ready for display and to be used!