Free Craft Project
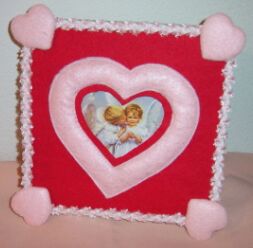
Heart Shaped Picture Frame
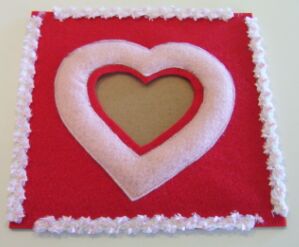
This heart shaped picture frame is something you'll want to make as a gift. Of course, it turns out so great you might not want to part with it once you've spent time creating one.
Matierals
- felt - 1 sheet red, 1 sheet pink
- polyester quilt batting
- decorative trim
- 8" x 10" stiff cardboard
- 1-1/2" x 7-1/2" stiff cardboard
- hot glue gun
- Elmer's glue
- needle and thread
Instructions
Cut an 8" x 8" piece from both the stiff cardboard and the red felt.
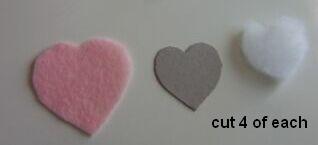
Using the heart templates, cut the following pieces:
From the pink felt, cut 1 padded heart and 4 border hearts. On the 4 border hearts, make a short slit at center top (see the red line on the border hearts template).
Cut out the center heart from the 8" x 8" red felt.
Double up the quilt batting and cut 1 padding template and 4 border hearts.
From the pink felt, cut 4 hearts that are 1/4" larger all the way around than a border heart.
That gives you all the following pieces:
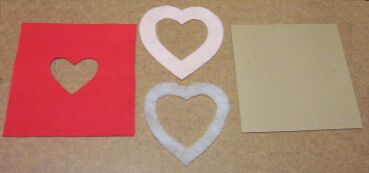
Spot glue the stuffed heart batting onto the stuffed heart cutout.
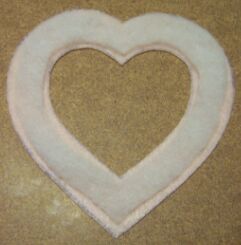
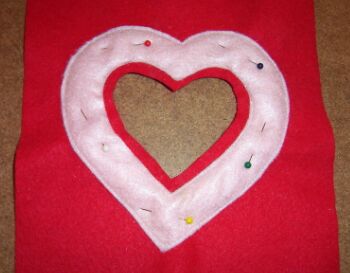
Center the pieces onto the red felt, carefully "framing" the center heart cutout. Pin in place and stitch both inner and outer edges of the pink heart all the way around.
From the back...
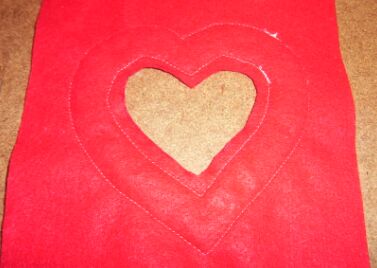
Glue the red felt to the 8" x 8" piece of cardboard along the side and bottom edges. (You need to leave the top open so a picture can be inserted.)
Cut 4 pieces of decorative trim and glue it to all 4 outer edges of the red felt.
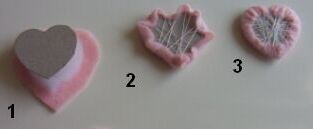
Create 4 padded corner hearts. Start by putting the cardboard, padding, and felt together (1). On the wrong side, stitch back and forth across the heart (2). Continue stitching back and forth until all the edges are completely secured (3).
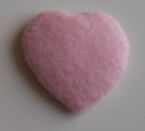
This is what the heart will look like when you're done...
Hot glue the 1 finished heart to each corner.
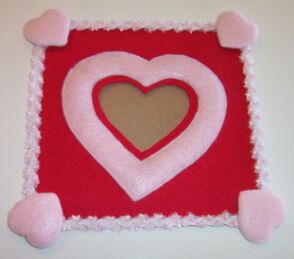
Insert a picture through the top opening between the red felt and cardboard.

Display Leg
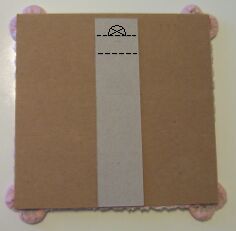
Cut a piece of stiff cardboard 1-1/2" x 7-1/2". Referring to the picture below, draw dotted line A, 1/2" down from the top edge. Draw dotted line B, 1-1/2" down from the top edge. These are the fold lines.
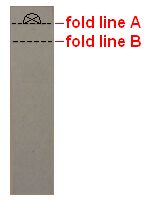
If you plan to hang the picture, draw and cut out a half circle, centered just above line A.
If you plan to stand the picture, fold the display leg outward slightly along line B.
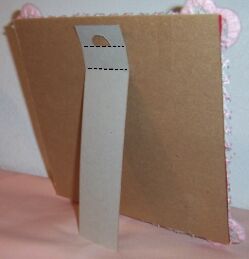
Spread glue between lines A and B and position the "leg" on the back of the picture frame, centered and flush with the bottom edge. Allow the glue to dry.