


Free Craft Project
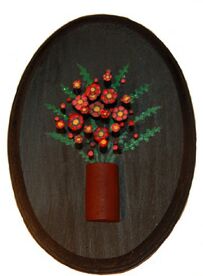
Nail Art Flower Bouquet
 Submitted by Karen Hunady from Crafts For All Seasons...
This nail art craft project shows you how to use a hammer and nails to make a beautiful flower bouquet. This would be a wonderful Mother's Day gift or a special gift for anyone who loves flowers! Other than pounding in the nails, the artwork needed is very easy.
Materials
- Wood plaque (they come unfinished in craft stores in various sizes)
- Hammer
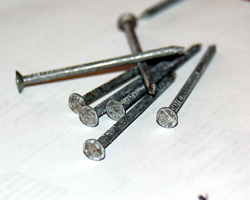
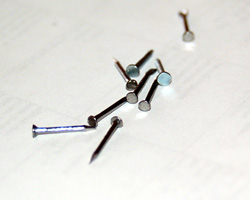
- Various size nails, in different lengths, and with different size heads. For the best effect it's important to have some with large heads - like roofing nails.
- Black spray paint
- wine cork
- razor blade or small saw (to cut the cork)
- Acrylic paints and paintbrush
- Hot glue or another strong glue
Instructions
1. Nail art requires a variety of nails. You will need several with large heads on them (I used seven). Use some tiny short nails, and some medium length nails.

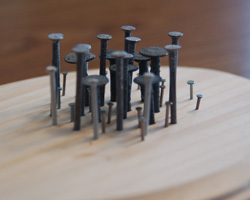
2. Begin to pound the nails into the wood using a hammer. It is important to take your time and pound lightly, and be sure the nail goes in straight. If it starts to go crooked, stop and fix the angle by tapping the nail on the side. You want the nails to be different heights in the wood for the 3D effect. Begin by tapping in one of your your largest head nails first, right where you want to center of your bouquet to be. This will be the center to work around. Next, start to hammer in all of your shortest nails. Just scatter them around the large nail, where you want the bouquet to be.

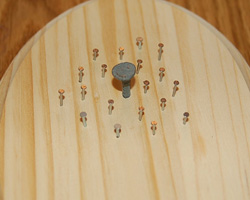
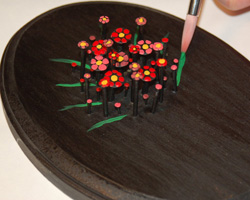
3. Next, pound in the medium height nails, and scatter them throughout the bouquet. End with your tallest nails. Here are photos of the placement I used for my nail art, and a side view to show you the various heights.
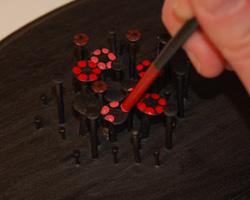
4. Spray paint the entire wood plaque black. You will probably need a couple coats to cover everything enough. Make sure the wood between the nails, and the sides of the nails themselves, all get covered in black. Allow this to dry well.
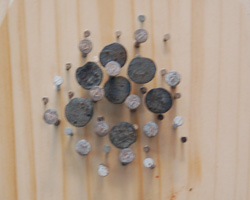
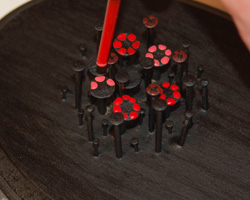
5. To paint the flowers on your nail art, use the back of your paintbrush and dip it in some acrylic paint. Use the back of the paintbrush to make dots for the petals. I used the color red, then made a lighter shade and darker shade of red by adding in a little white and black. I used yellow paint for the middle of the flowers. The very tiny nail heads can just be painted over with one color, since they are too small to actually paint a flower on them.
6. Use some green paint and add some greenery in the background, or none at all... this is your personal creation!
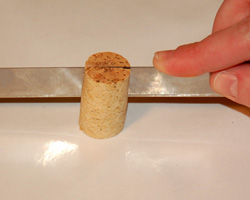
7. For the vase, cut the cork in half lengthwise using a razor blade. Then paint the cork with acrylic paint and allow to dry. When it is dry, you can hot glue this to the bottom of the flower bouquet.
8. When the nail art plaque is dry, you can add a picture hanger to the back for hanging.