Free Craft Project
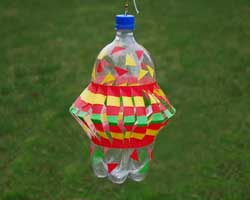
Plastic Pop Bottle Wind Spinner
Submitted by Karen Hunady from Crafts For All Seasons...
This pop bottle wind spinner is really fun to make, and they look great hanging from a branch of a tree in your yard. They easily catch the wind and they can get spinning pretty fast. Make several in different colors and create a mobile of them hanging from one tree. They are a delight to watch!

Materials
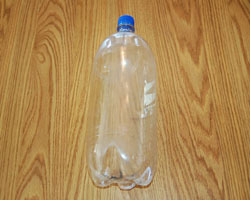
- An empty plastic two-liter pop bottle
- Colored electrical tape, or labeling tape
- Scissors
- Flexible tape measure
- Pen or pencil
- Exacto knife
- Paper clip
- Ball bearing swivel (used for fishing, and can be found by the fishing accessories in any discount store)
- String for hanging
Instructions
1. Begin your pop bottle wind spinner by rinsing it out well, and removing all the labels, as best as you can.
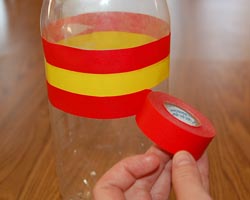
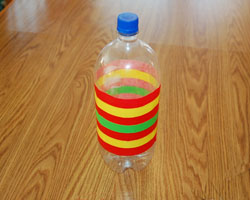
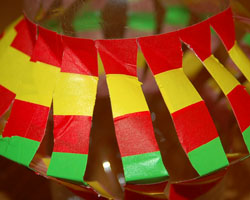
2. Run lengths of colored electrical tape around the middle of the pop bottle, as shown. This will also help cover any of the label that still might be stuck on.
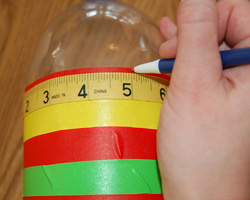
3. Measure along the top tape strip with a flexible measuring tape. Use a pen or pencil to measure off 3/4 inch sections.
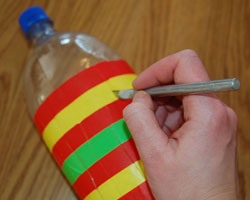
4. Using an exacto knife, cut a vertical strip down the length of the pop bottle at each 3/4 inch mark. Begin at the top of the tape strip, or about at the point where the pop bottle is straight and not curved from the top. Extend the cut all the way to about 2 inches above the bottom. You may find it is hard to keep the cut lines straight. Take your time and do the best you can. If some are curved cuts, you will hardly notice in the final result.
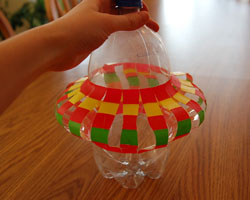
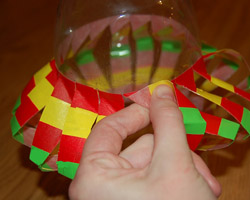
5. Next, squish down the pop bottle. This will make the strips flare out. When they do, pinch each strip in the middle to create a fold.
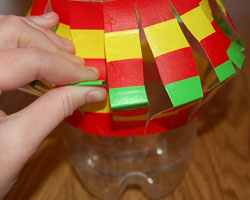
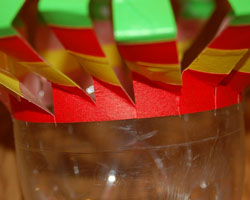
6. The next step is to angle the strips by making folds at the top and bottom, so the wind can catch them. To do this, begin at the top. Make a 45 degree fold to the right at the very top of each strip. See the photos below for help.
7. Now, at the bottom of each strip, make a 45 degree fold to the left.
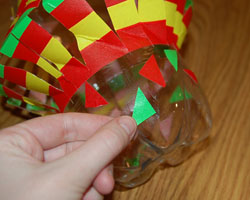
8. You can also add other details to the wind spinner. Here I cut little triangles out of the tape and decorated the top and bottom of the pop bottle.
9. Now you are ready to make the top for your pop bottle wind spinner. Make a hole in the top of the pop bottle cap. The easiest way to do this is by heating the end of an untwisted paper clip, then melting quickly through the plastic (be careful, plastic fumes are not good for you). Or, you can use a drill to make the hole. Another method is to pound a nail into the top of the cap to form the hole.
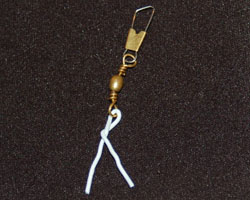
10. Unfold a paper clip (I used a white paper clip). Thread the wire of the paper clip through the end of the ball bearing swivel. Then, twist the wire together once or twice to form a loop.
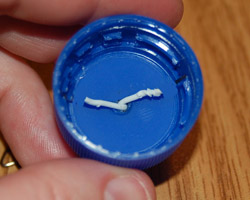
11. Push the wire ends of the paper clip through the top hole of the bottle cap. Fan out the wire ends inside the cap to anchor into place.
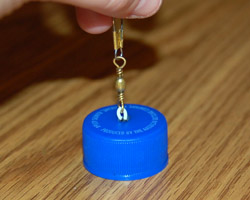
12. Screw on the pop bottle cap, add a string for hanging, and you are ready to hang your wind spinner!