Free Craft Project
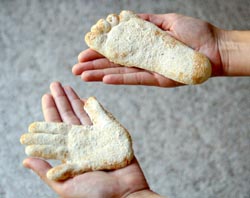
Sand Casts
Submitted by Karen Hunady from Crafts For All Seasons...
Sand casts are easy and fun to make. You can start a wonderful tradition with your children. If you visit a beach every few years for summer vacation, try making sand casts of their hands and feet each year. It will be fun to see how much they have grown from year to year. They also make wonderful souvenirs from the trip. They can be framed in shadow boxes, used as paper weights, kept with your children's seashells, or a string or hook can be added to the back for a wall hanging. The entire craft can be made at the beach, but if you don't get there often, you can also do the craft in your backyard sandbox.

Materials
- Sand (at the beach or in the sandbox)
- Plaster of Paris
- Sand pail
- Shovel or other mixing tool
- Your child's hands and feet
Instructions
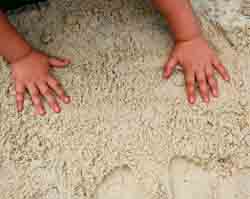
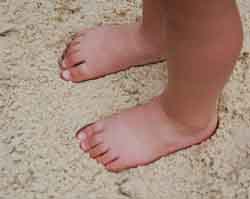
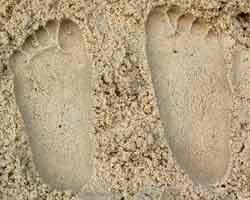
1. Begin the sand casts by "fluffing" up the sand a little. Use a sand rake or sand shovel to rough it up. You don't want the sand to be too packed down or you will not get a deep mold. Next, place your child's hands and feet deep into the sand. Tell them to push down hard. For a small child, it helps if you push down each little finger and toe deeper into the sand. Then, help your child off and take a look at the molds. You want the molds to be deep enough to hold plaster. Re-do them if necessary.
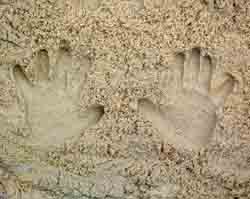
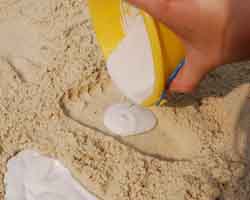
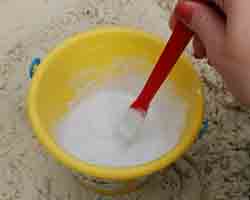
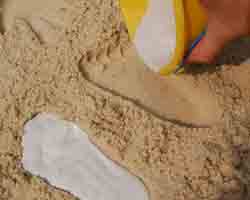
2. Next, mix up the Plaster of Paris in the sand bucket with some water (water from the lake or ocean is just fine). Read the package instructions, it is usually 1 part plaster to 2 parts water. Mix it up using a sand shovel or stick. You want the consistency to be like a thick gravy, but thinner than pudding. Make sure to get all the lumps out. Then gently pour the plaster mixture into the molds. If you make a thinner plaster mix, the mix will have no problem filling in the little toes and fingers, but you can also use a small stick to help guide the plaster mix throughout the mold if necessary. If desired, you can add a small cord or a hook to the back of the mold for a wall hanging.
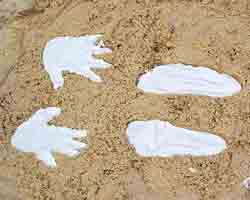
3. Now you wait for them to dry. Do not be too anxious! It takes a least 30 minutes. It is best to do this activity soon after arriving at the beach, then you can remove the molds later in the day when you are ready to leave. Carefully remove the molds and rinse them off really well in the water. Mark the back of each mold with a permanent black marker with the child's name, age, and vacation spot, if you like.