


Free Craft Project
String Snowflake
Submitted by Karen Hunady from Crafts For All Seasons...
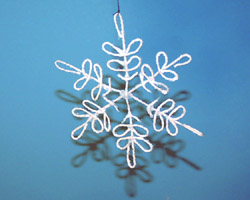
This snowflake craft looks very elegant hanging in front of a window, or together in groupings. They sparkle ever so slightly, thanks to some glitter spray added at the end. Take your time and you'll be amazed at the results. If these are stored carefully, you can enjoy them for many years to come.
Materials
- White string or white embroidery floss
- Fabric Stiffener (available in craft stores)
- Scissors
- Ruler for measuring string
- Wax paper
- 6 straight pins
- Piece of cardboard or a cork board
- Glitter Spray (optional, but highly recommended)
- Black thread or fishing line for hanging
Instructions
1. Begin the snowflake craft by printing out this template (clicking on the template link will open a PDF file in a new window).
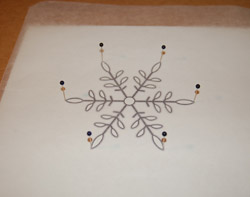
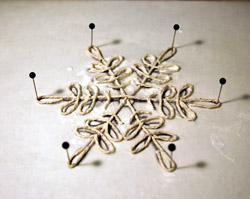
2. Place your template on a piece of thick cardboard, or a cork board. Then, place a piece of wax paper over the template. Push pins in each end point of the snowflake, going through the wax paper, to attach the template securely to your base.
3. Cut the white string in the following sizes for template 1: three pieces that are 6.5 inches long; six pieces that are 0.5 inch long, and 12 pieces that are 2.5 inches long.
4. Pour a little fabric stiffener into a small cup, and dip your string pieces to saturate them well. When you pull them out, use your fingers to drag the string through to remove any excess solution.
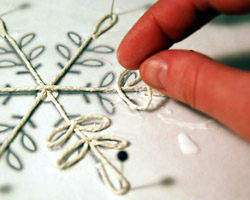
5. Begin by working with the long strings that are 6.5 inches long. These make up the snowflake's six "arms". Lie the string over wax paper, tracing the template. Wrap the string in a loose loop around the pin. Just follow along the pattern as if you are tracing. Take your time! When this is dry it is going to retain its shape and look amazing!
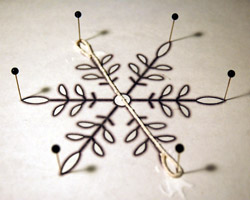
6. Next, work with the 2.5 inch lengths of string. Use these to trace the loops that appear on each snowflake arm. Don't get too worried if you don't get them exactly placed well. The shape of the double loop is more important. When this is dry, you will have to glue them in place anyhow since the fabric stiffener is not strong enough to hold the bond.
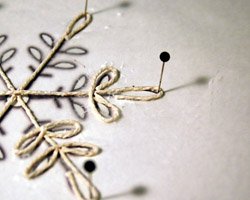
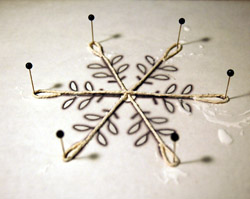
7. Finally, you can use the tiny 0.5 inch strings lengths for the last "V" shape that occurs on each snowflake arm. When finished, allow the whole snowflake to dry overnight.
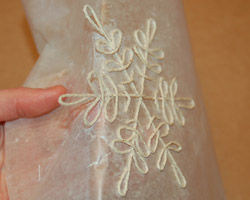
8. When the snowflake craft is completely dry, gently peel it up and away from the wax paper. Take your time. Don't worry, some of the loops are going to peel off from the main snowflake base. You can glue these on later for extra support.
9. Use some strong clear glue at this point to reinforce all the points where strings cross. It is important to put a good dollop of glue right in the center of the snowflake, where the three strings meet. You also will want to glue each pair of loops and the 0.5 inch "V" shapes to the arms. Allow to dry well, preferably overnight. Do the gluing on the wax paper again.
10. When the snowflake craft is dry, cut away any excess glue. Add glitter for sparkle. I really like the glitter spray paints that are available now in craft stores. Silver looks really good. Or, you can spray the snowflake with spray adhesive, then shake some white glitter over it.
11. Add a thin black thread, or clear fishing line to the snowflake craft for hanging.