


Free Craft Project
Soda Can Wind Spinner
This is not a craft that's exclusive to Free Craft Unlimited but we've had so many requests about how these particular soda can wind spinners are made, we decided to provide complete instructions.
Materials
- 2 clean aluminum drink cans
- 9" piece of stiff wire
- 6 pony beads (or similar)
- kitchen scissors (or the equivalent)
- utility knife (optional)
- needle-nose pliers
- awl (or nail and hammer)
- 8-1/4" x 2-1/2" piece of paper (template)
- ruler
- fine tip felt marker
Instructions
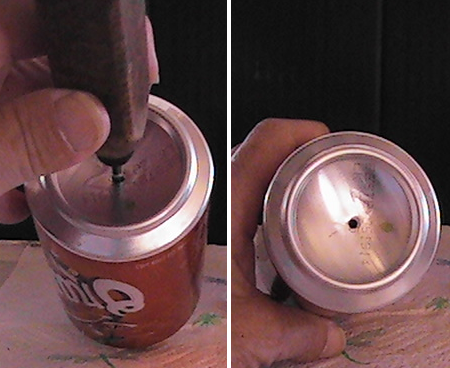
Using an awl or nail and hammer, punch a hole dead center in the bottom of each can.
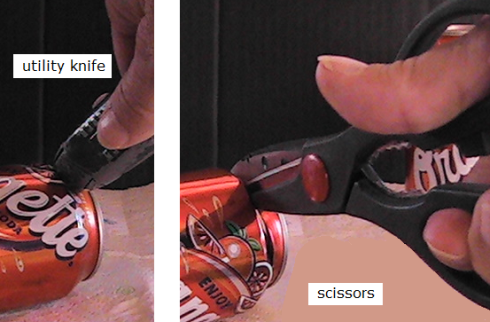
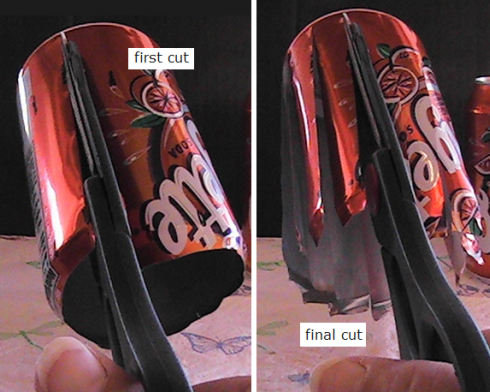
Cut the top off each can just above the bend where it narrows. You can either cut it off using a utility knife or punch a starting hole and cut the top away using scissors.
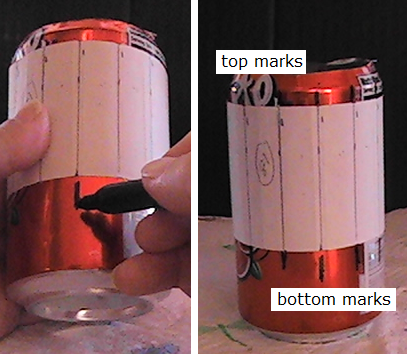
Place lines on the piece of paper that are 5/8" apart (you should wind up with 13 segments that are fairly equal). Wrap the template around one of the cans and place marks all the way around top and bottom. Repeat the process with the second can. NOTE: We only used a heavy black marker so the lines were clearly visible for these instructions. You'll want marks that are less visible or can be easily wiped off.
Using your top and bottom marks as a guide, cut slits from the top edge to within 1/4" from the bottom. This will give you 13 "spokes" on each can.
Fan each of the spokes outward and down. If you press your thumb against the bottom of each spoke before bending them with your other hand, it will help prevent the metal from crimping.

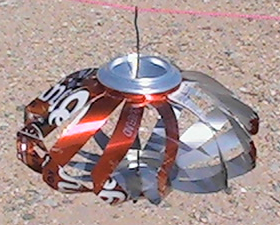
Here's what you should have when you're done fanning the spokes.
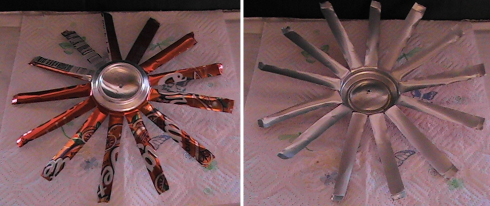
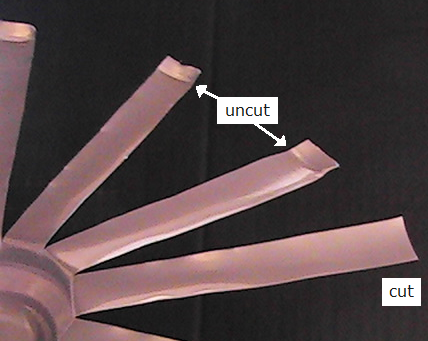
Cut away the excess metal at the end of each spoke where the can originally narrowed at the top.
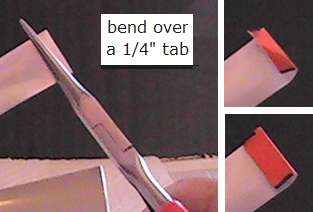
Use the pliers to fold over the end of each spoke (about 1/4" will do). Flatten each fold slightly.
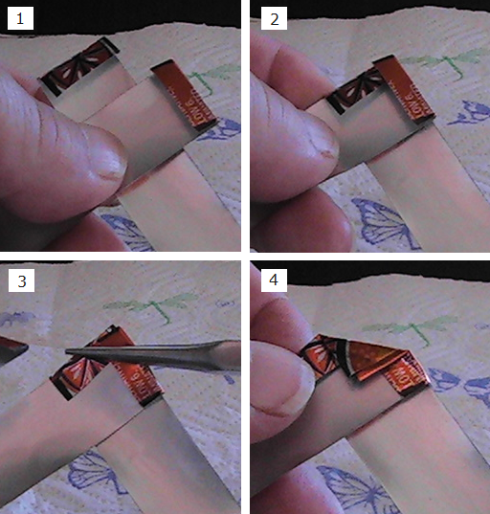
Overlap the end of a spoke from one can with the end of a spoke from the second can (figure 1 below). Slide the corners together (figure 2). Holding firmly with the fingers of one hand, use the pliers to bend the corner over (figures 3 and 4). Use the pliers to crimp the folded corner down tight.
Moving up to the next spoke on each can, overlap the ends and then bend and crimp down the corner just like you did above.
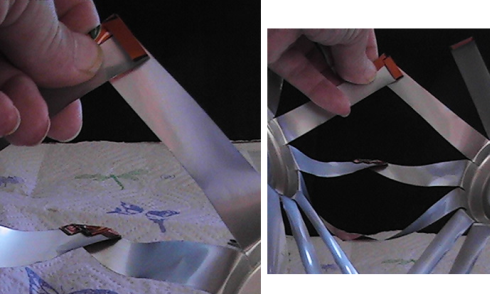
Repeat the process all the way around until all the spokes of one can are joined to the spokes of the other.
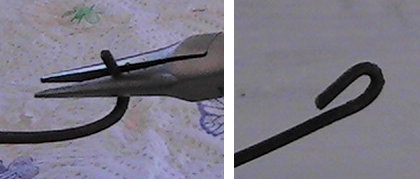
Bend a small loop at one end of the stiff wire.
Thread 3 beads onto the wire and then run the wire through the holes in both cans from bottom to top.
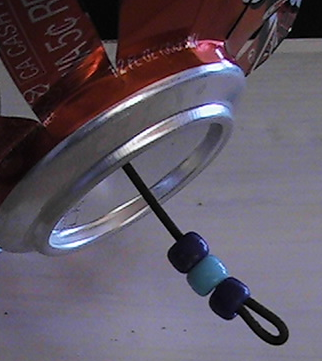
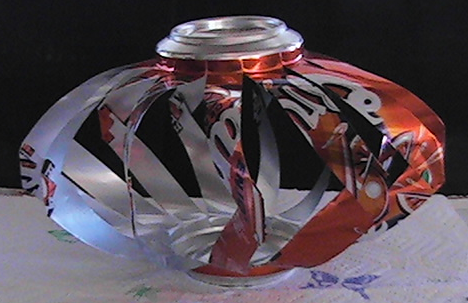
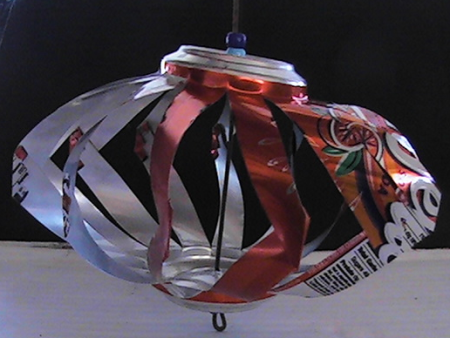
Place the three remaining beads onto the wire and attach one of the soda can tabs to the end. That's it. Your soda can wind spinner is now ready to hang wherever your like!
If you'd like to stack two or three spinners, use soda can tabs to join the wires of one spinner to another.