


Free Craft Project
Stuffed Teddy Bear Toy
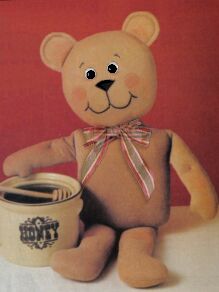 This stuffed teddy bear craft project proves you just can't get any cuter than this. If you're into teddy bears, you'll definitely want to make one for yourself. Of course, they make great gifts as well, for adults and children alike.
Materials
- velour fabric - tan
- matching thread
- black felt (for the nose)
- black thread
- black embroidery floss
- embroidery needle
- 4" long pieces of 1/4" wooden dowel
- wiggly eyes (see note below)
- 24" - 1" ribbon
- polyfill
- small embroidery hoop
- blush makeup (optional)
Note: If you are making this stuffed teddy bear toy for a young child, you should eliminate the wiggly eyes and embroider them on instead.
Instructions
Start by printing the teddy bear pattern. Trace it onto your fabric and cut out each of the pieces.
Transfer all markings except facial features onto the wrong side of fabric.
With right sides facing, sew two arm pieces together. Make certain you leave an opening between the X's marked on the pattern. Turn right side out and stuff lightly to within an inch of the opening. Repeat the process for the second arm and both the legs.
On the arms and legs, make a small stitch from front to back where the dimples are indicated on the patterns. Pull thread taut and knot securely (when assembled the knots should be on the back of the arms and legs).
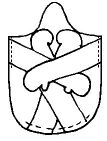
Pin the arms and legs to the front side of the body, positioning them according to the dots indicated on the pattern and referring to the illustration shown here.
Baste the arms and legs to the body.
Sew the two body pieces together with the arms and legs sandwiched between them. Make certain you leave the seam open between the X's indicated on the pattern.
Turn piece right side out and stuff firmly, inserting the dowel up into the neck to make it rigid. Slipstitch the opening.
Transfer facial features onto the right side of one of the two head pieces. Using embroidery thread, backstitch mouth and eyebrows (and eyes if you're not using wiggly eyes).
Backstitch - up at A, down at B, up at C, down at A, etc.
Pin nose to face where indicated on pattern and overcast with black thread.
Stitch two ear pieces together, leaving the opening between X's indicated on the pattern.
Turn right side out and stuff lightly. Machine stitch around ear 1/4 inch from outside curved edge (finish stitching). Slipstitch opening. Repeat for other ear. With right sides together and raw edges even, baste ears to one head piece between dots where indicated on the pattern.
Sew both head pieces together with ears sandwiched in between. Clip back of head along neck opening lines indicated in red on the pattern. Turn right side out and stuff firmly.
At back of head, fold pointed flaps to the inside and push finger into the hole to make room for the neck of the body. Insert neck into the head opening (add more stuffing if necessary). Slipstitch around the opening twice to secure the head to the body.
Dust cheeks, inner ears, elbows and knees with blush. Tie ribbon around the neck in a nice bow. NOTE: Eliminate these two steps if the teddy bear toy is for a young child.