


Free Craft Project
Turkey Placecard Holder
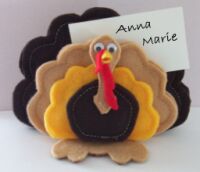
There's no way you're ever going to find a cuter accessory for your holiday table setting than this turkey placecard holder. You can even give them to your guests as party favors. Assuming you can bear to part with any of them!
Materials:
- felt (dark brown, tan, gold, red)
- small googly eyes
- polyester batting, quilter's low loft
- stiff cardboard (2" x 3" piece)
- glue
Instructions
Using template 1 and template 2, cut out all the felt turkey pieces. Following the dotted lines on Tail Feathers A, Tail Feathers B, Tail Feathers C, Head, and Body patterns, cut batting for each of those parts.
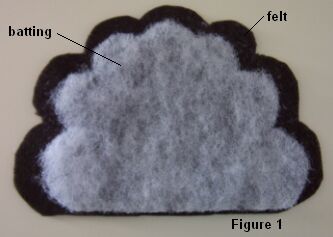
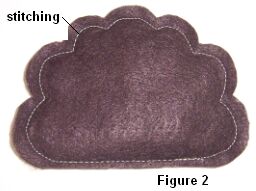
Position batting on one of the Tail Feather A felt pieces as shown in Figure 1. Place duplicate Tail Feather A felt piece on top and then stitch all around the edge, following the overall shape (Figure 2). Repeat with all the remaining parts that require batting.
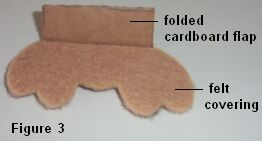
Cut cardboard feet and bend the flap forward on the dotted line. Glue the felt feet onto the cardboard (Figure 3).
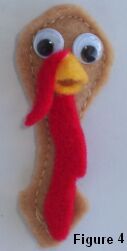
Squeeze the upper beak to create the proper shape and then glue (or stitch) it in place. Do the same with the lower beak. Glue the eyes, snood, and wattle in position (Figure 4).
Assembly
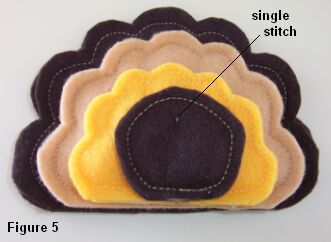
Position Tail Feathers A, Tail Feathers B, Tail Feathers C, and the Body one on top of the other. At the top center of the Body, run a stitch through all four pieces and tie off (Figure 5).
Glue (or stitch) the head in place. Slip the cardboard flap of the feet in between the bottom of Tail Feathers B and Tail Feathers C and glue in place (Figure 6).
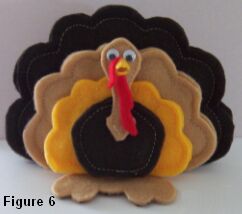
Now the only thing left to do is tuck a named placecard in between the top portion of the back two tailfeathers. And of course, make a bunch more turkey placecard holders!