Free Craft Project
Gel Wax Candle Holders
Submitted by Karen Hunady from Crafts For All Seasons...
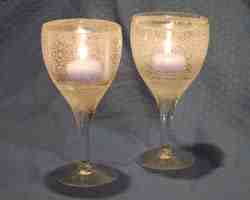
These gel wax candle holders are a beautiful decoration for the winter season, or any time of year, and they can be used over and over again. The clear gel wax can also be dyed different colors to match any motif. This craft is very easy to make so they're perfect for gift-giving.

Materials
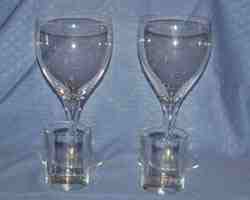
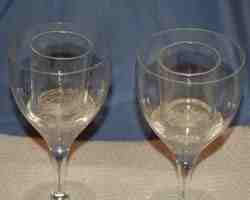
- 2 wine glasses
- 2 glass votive holders (a simple style is best, and make sure it is small enough to nest nicely inside the wine glass)
- a container of gel wax
- a small sauce pan
Instructions
1. Begin the gel wax candle holders by first washing the wine glasses and votive holders and allow them to dry completely.
2. The second step for the gel wax candle holders is to place the votive holders inside the wine glasses and get an idea of how much wax you will need to add below the votive holders, to have them be flush (or near flush) with the top of the wine glasses. Then remove the votive holders.

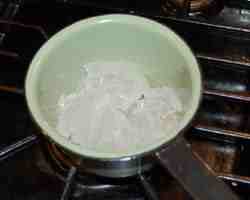
3. Get your pot ready. Gel wax is very easy to clean up, so you don't have to have a "dedicated" candle cooking pot, although it does help. The gel, once cooled, will simply peel off from the inside of the pot. Then the pot can be washed with grease-fighting dish detergent. Cut the gel wax with a knife, then use a spoon or your hands to pull out chunks of the wax to put in the pot. Don't be afraid to use our hands. Gel wax is very clean and using your hands is usually the easiest way to get it out! Try to over-estimate rather than under-estimate the amount of wax you need, since any extra is re-usable (when it solidifies, just put it back in the original container to be re-used).
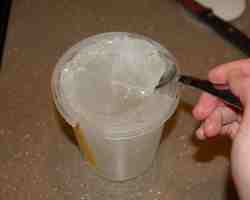
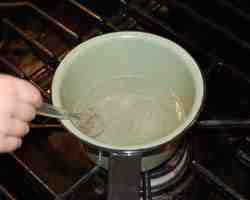
4. Heat the wax over the lowest heat setting on the stove until it begins to melt. Never use a microwave! You can stir the wax to speed up the process.
NOTE: Usually when working with gel wax you should NOT stir it, since this introduces bubbles. But since we want bubbles in the candle holders, stirring is fine.
Once it is all melted, you are ready to move on to the next step. DO NOT let it sit long on the heat after it has melted, as it can get too hot. Follow the manufacturer's instructions exactly. They may suggest using a candy thermometer. Gel wax is highly flammable, so use caution. Never leave the pot and watch it constantly. If it does ignite, do not pour water on it. Instead, extinguish by covering with the lid or use baking soda.
Note: If you would like to add fragrance or color to the wax, do this now. Use only fragrance and color that is meant to be used for gel candles.
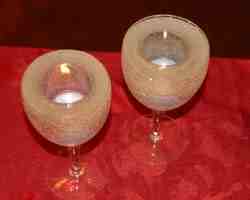
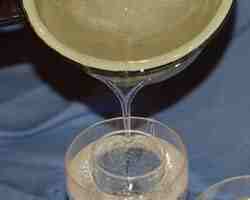
5. Gently and carefully pour gel wax into the bottom of the wine glasses, up to the level that you approximated. Once this wax is hardened, you want to sit the votive cups on top and have the votive holder rim be near flush with the outside rim of the wine glasses. Allow this gel wax to harden (this will not take long... about 10 minutes).
NOTE: Usually there are plenty of bubbles in the gel wax, but if there are not enough to your liking, you can easily introduce some. While the wax is still liquid, place a straw into the wax and blow to introduce bubbles!

6. Place the votive candle cups inside the wine glasses on top of the solidified gel wax. Center them as best as you can. Warm up the remaining wax over to the stove and then carefully pour the wax into the wine glass, outside of the votive cup holder. Fill the wine glasses up near to the top. If you need to introduce more bubbles, follow the tip in step 5.
7. Allow the gel wax candle holders to solidify. Add a tealight or votive candle to the inside cup and enjoy!