


Free Craft Project
Halloween Candy Bucket
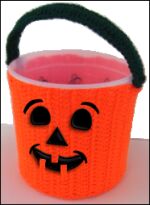
Turn a boring plain container into this creative and whimsical Halloween candy bucket. The perfect accessory for any trick-or-treater. Or use it to hold the give-away candy by the door.
Materials
- Yarn - 1 skein orange, small amount of green
- Dark brown yarn or felt to create pumpkin eyes, nose, and mouth
- Crochet hook - size H
- Yarn needle
- Hot Glue Gun (optional)
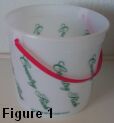
- 1 gallon-size plastic ice cream container (with handle)
Instructions
Handle Cover
Using green yarn, ch 55. Hdc in 3rd ch from hook. Hdc in each of the remaining chains. Slip stitch and tie off.
Repeat entire process to make a second piece.
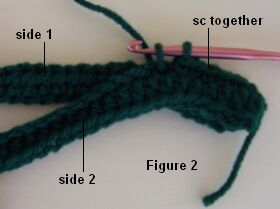
Put both pieces together and sc across the top edge from one end to the other (Figure 2).
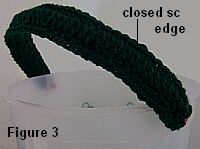
Position the joined piece over the handle of the ice cream container. Sc from one end to the other to close the open edge. Slip stitch and tie off (Figure 3).
Bottom
Ch 4.
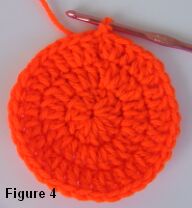
Round 1 - 11 dc in 4th ch from hook. Join with sl st at top of ch 4.
Round 2 - Ch 3, dc in same st. 2 dc in each st around. Join at top of ch 3.
Round 3 - Ch 3. Dc in next dc. *2 dc in next dc. Dc in each of next two dc. Repeat from * all the way around. Join at top of ch 3. (Figure 4)
Repeat Round 3 until piece is the same size as the bottom of the ice cream container.
Sleeve
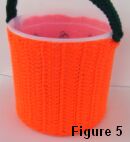
Ch 31. Dc in third chain from hook. Dc in each of the remaining 29 chains. (29 dc stitches). Ch 2. Turn.
Dc in each of the 29 dc. Ch 2. Turn.
Repeat rows until the piece stretches snuggly around the ice cream container (Figure 5).
Pumpkin Face

You can create the pumpkin face in either of the following ways.
1. Cut out felt pieces for the eyes, nose, and mouth and sew or glue them in place.
2. Using dark yarn or thread, crochet or embroider the eyes, nose, and mouth.
Once you've finished creating the pumpkin face, stitch the sleeve seam together.
Attach the bottom to the sleeve by stitching all around the bottom edge of the sleeve. Slip combined piece over the container.
To secure the sleeve at the top edge of the bucket, you can do one of the following.
1. Spot glue the sleeve in place with a hot glue gun.
2. Punch holes all around the top edge of the container and sew the sleeve in place.